Penguin Tutorial
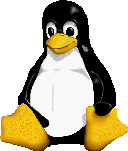
 All of the
penguin pictures were created entirely within
The GIMP (version 0.54).
The majority of the drawing was done on my 486 DX2/50 running linux. I used
nothing but a mouse and a lot of patience. The final smoothing was done on
an SGI Crimson (also using the GIMP) only because my home machine
has an 8-bit display.
I started by drawing a rough outline of the penguin, and carefully closed
all the holes in the shape. I next filled in the spaces
left by the
outline with black, and continued shaping it using different
sized crisp* brushes. Once had the initial image done in black and white,
I laid out the beak and feet in approximately
the right places and filled in their outlines using the same techniques.
I continued by adding
the initial shading. Applying a small crisp brush with
slightly darker yellows to the edges of the beak and feet caused the
image to start
taking on depth. Continuing this process with several shades of yellow
and grey I managed to block in the shape of the shadows that I wanted.
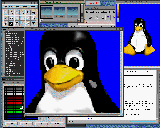
 Whenever working on small areas or doing careful work, I find it
extremely useful to open another view of the image I am working on.
I zoom in on one window and keep the other unzoomed. Then I arrange the
windows so that I can see them both simultaneously. Now I am able
to draw in the zoomed window where a small slip of the mouse won't
mean disaster**,
but also able to see how the work I am doing looks at its actual
size and resolution.
Once I had the shape and primary shading done to a level I liked I brought
out the convolve tool. The convolve tool is very useful when drawing things in
the GIMP. It allows you do hand anti-aliasing, controlled smoothing,
and a host of other neat effects. I used the convolve tool set on
blur with several different brush sizes sizes to smooth out the
shading. I also used the air-brush extensively to lighten or darken
areas that I had smoothed a little too flat.
Essentially I applied those techniques over and over again until I was
satisfied with the results.
Finally to create the black and white and three color versions I used
the Threshold plug-in available from the
plug-in registry to create a thresholded image that I then touched up by
hand to smooth out the flow of the lines and to add hints of detail.
* crisp as opposed to fuzzy
** disaster in the GIMP in a very relative term given the very robust undo
features.
Larry Ewing <
lewing@isc.tamu.edu >
 Whenever working on small areas or doing careful work, I find it
extremely useful to open another view of the image I am working on.
I zoom in on one window and keep the other unzoomed. Then I arrange the
windows so that I can see them both simultaneously. Now I am able
to draw in the zoomed window where a small slip of the mouse won't
mean disaster**,
but also able to see how the work I am doing looks at its actual
size and resolution.
 All of the
penguin pictures were created entirely within
The GIMP (version 0.54).
The majority of the drawing was done on my 486 DX2/50 running linux. I used
nothing but a mouse and a lot of patience. The final smoothing was done on
an SGI Crimson (also using the GIMP) only because my home machine
has an 8-bit display.